Updated March 2026 | Home Energy Efficiency Guide
Why is air sealing the most important first step in any weatherization project?
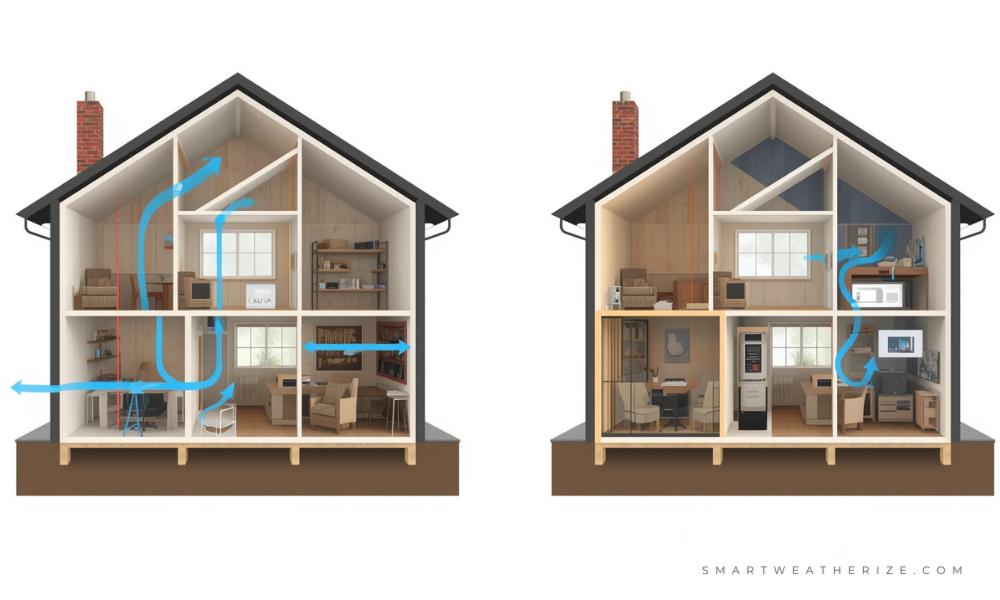
Air sealing closes unintended gaps, cracks, and openings in a home’s building envelope to stop uncontrolled airflow—the primary driver of heat loss and gain. The U.S. Department of Energy identifies air sealing as the most cost-effective energy efficiency upgrade, capable of reducing heating and cooling costs by up to 20% annually. Without it, even well-insulated homes experience drafts, energy waste, and inconsistent temperatures.
Weatherization—the process of enhancing a home’s energy efficiency—has become increasingly crucial as homeowners strive to lower their energy bills, enhance comfort, and minimize their environmental footprint. At the heart of this strategy is air sealing, the critical first step that sets the stage for all other upgrades, including insulation and HVAC improvements.
In this guide, we’ll explain why air sealing is foundational to a successful weatherization plan, how it affects energy performance, comfort, and indoor air quality, and explore the tools, techniques, and materials used. We’ll also highlight real-world case studies, expert insights, and debunk common misconceptions about air sealing in weatherization.
Key Concepts in Air Sealing and Weatherization
Building Envelope
The physical barrier between conditioned indoor space and the outdoors—including walls, roof, foundation, windows, and doors—where air leaks most commonly occur.
Blower Door Test
A diagnostic test using a calibrated fan to depressurize the home, measuring air leakage in CFM (cubic feet per minute) to pinpoint exactly where air escapes.
Thermal Bridging
Areas where heat transfers more readily through the building structure—such as framing studs or uninsulated corners—bypassing surrounding insulation.
WAP (Weatherization Assistance Program)
A federal DOE program providing free weatherization services—including air sealing—to income-eligible households. Over 7 million homes served since 1976.
What Is Air Sealing and Why Does It Matter?

Air sealing refers to the process of closing unintended gaps, cracks, and openings in a building’s exterior—collectively known as the building envelope—to stop uncontrolled airflow. These leaks are typically found around doors, windows, attics, basements, plumbing penetrations, and wiring passages. While insulation slows the transfer of heat, air sealing prevents air movement, which is the primary driver of heat loss and gain. Without air sealing, even well-insulated homes will experience drafts, energy waste, and inconsistent temperatures.
An airtight envelope helps maintain the separation between indoor and outdoor environments. It reduces energy waste by keeping conditioned (heated or cooled) air inside, improves indoor air quality by keeping out pollutants, allergens, and outdoor moisture, and enhances thermal comfort by eliminating drafts and cold or hot spots. In essence, a properly sealed home performs more consistently and efficiently, no matter the season.
Up to 40%
Of a home’s total air leakage comes from commonly overlooked areas like attics, basements, plumbing penetrations, and electrical wiring passages—areas that air sealing specifically targets.
Why Air Sealing Comes First in Every Weatherization Project

Think of energy efficiency upgrades as a pyramid. At the base is air sealing, the most cost-effective and impactful measure. Before investing in expensive HVAC systems or layers of insulation, it’s essential to reduce the overall energy demand by eliminating the uncontrolled airflow that wastes conditioned air. The U.S. Department of Energy advises sealing air leaks as the first step because it ensures all other investments perform as intended.
Sealing leaks allows insulation to work more effectively by stopping the movement of air through it. Without air sealing, insulation can act more like a filter than a thermal barrier—air passes right through fiberglass batts, carrying heat with it. Similarly, HVAC systems don’t need to overwork to compensate for lost conditioned air, extending their lifespan and reducing energy consumption. As a homeowner paying hundreds each month in utility bills, this sequencing matters enormously for your return on investment.
Air leaks also allow moisture from the outside to enter, particularly in basements and attics. This not only increases the risk of mold growth but can degrade building materials and reduce insulation effectiveness over time. Sealing these leaks first helps create a healthier, more durable home—protecting both the structure and the people living inside it.
“Without air sealing, even the best insulation is like wearing a down jacket with holes in it.”
— Linda Wigington, Founder, Affordable Comfort Inc.
6 Key Areas to Focus on for Effective Air Sealing
Air leaks can be found in virtually every home, regardless of age. Research from the Lawrence Berkeley National Laboratory shows that air sealing can reduce leakage by 25–40%, especially in older homes. Here are the most common points of air infiltration that should be prioritized:
Attics & Attic Hatches
Gaps where framing meets ceilings, around recessed lights, duct penetrations, and unsealed attic access doors are among the largest leak sources.
Basements & Crawlspaces
Rim joists, sill plates, and foundation wall joints allow significant air infiltration and moisture entry from below the living space.
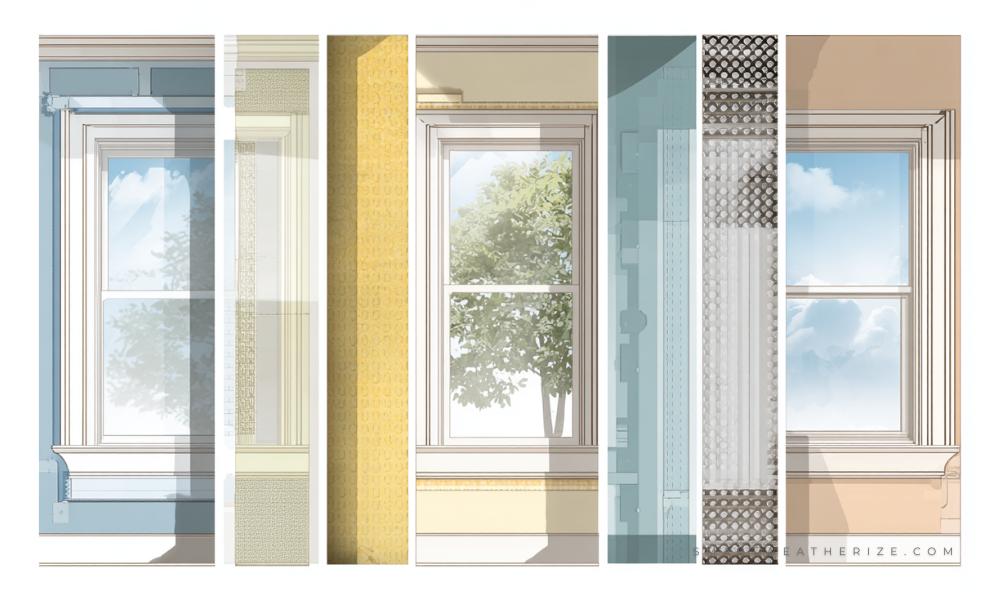
Windows & Doors
Poorly sealed frames, outdated weatherstripping, and gaps between trim and framing let conditioned air escape continuously.
Plumbing & Electrical Penetrations
Every hole drilled through walls, floors, or ceilings for pipes, wiring, or outlets creates an air pathway that bypasses your insulation entirely.
Ductwork Connections
Leaky HVAC ducts can lose 20–30% of conditioned air before it reaches living spaces — sealing with mastic or foil tape is essential.
Fireplace & Chimney
Open dampers and unsealed chimney chases act as direct air highways between conditioned indoor space and the outdoors.
Diagnostic Tools and Materials Used in Professional Air Sealing
To detect air leaks accurately, professionals use a combination of diagnostic tools. Blower door tests depressurize the home to reveal leaks by measuring airflow in CFM (cubic feet per minute). Infrared cameras detect heat signatures and insulation gaps invisible to the naked eye. And smoke pencils or incense sticks visually trace air movement near suspected leak areas, confirming exactly where conditioned air is escaping. These diagnostics are essential for identifying both obvious and hidden problem areas—and they’re the reason a professional energy audit is always recommended before beginning any weatherization project.
While some air sealing projects are well within the scope of a handy homeowner—like caulking windows or installing weatherstripping—others are best left to certified professionals. Contractors accredited by the Building Performance Institute (BPI) have the tools and expertise to tackle complex areas like attic bypasses, duct systems, and foundation joints, ensuring long-term performance. If you’re unsure where to start, begin with a professional energy audit to determine where professional air sealing is most needed and avoid common DIY mistakes.
Ready to Start Saving on Energy Bills?
Air sealing is the single most cost-effective upgrade you can make. Find out if you qualify for free weatherization assistance or local utility rebates.
Energy and Cost Savings from Air Sealing: What the Data Shows
According to the U.S. Department of Energy, air sealing can reduce a home’s heating and cooling costs by up to 20% annually. Considering that heating and cooling typically account for nearly half of a home’s total energy use, the savings are substantial—often hundreds of dollars per year. Homes that are properly sealed also experience lower monthly utility bills, longer-lasting HVAC systems, reduced maintenance and repair costs, and increased resale value due to documented energy efficiency upgrades.
20%
Annual heating/cooling cost reduction from air sealing alone (U.S. DOE)
$283–$372
Average annual savings per weatherized household (Oak Ridge National Lab / DOE)
25–40%
Reduction in air leakage achievable through professional sealing (Lawrence Berkeley Lab)
89%
Of U.S. single-family homes are under-insulated (ICF Consulting study)
Rebates and Weatherization Programs
Many states offer rebates and incentives through federal and local weatherization programs. The Weatherization Assistance Program (WAP) provides free services—including air sealing, insulation, and energy audits—to income-eligible households in all 50 states. ENERGY STAR Home Upgrade bundles air sealing with insulation for maximum combined impact. And local utility providers often offer cash rebates for air sealing work conducted by certified professionals. Check the Database of State Incentives for Renewables & Efficiency (DSIRE) for current offers in your area.
Real-World Case Studies: Air Sealing in Action
Case Study 1: 1940s Home in New York
A single-family home built in the 1940s underwent a blower door test that revealed significant air leakage throughout the building envelope. After professional air sealing using spray foam and caulk—targeting attic bypasses, rim joists, and plumbing penetrations—leakage was reduced by 35%, leading to an estimated $450 per year in heating cost savings. The homeowner recouped the project cost within three years and reported dramatically improved comfort during harsh Northeast winters.
Case Study 2: Multi-Family Housing Retrofit

In a Midwest city, a local utility sponsored air sealing retrofits in a 30-unit apartment complex. The result: dramatically improved tenant comfort, reduced HVAC complaints, and a 15% decrease in tenant turnover—translating to long-term savings for property managers who previously spent thousands annually on vacancy costs and maintenance calls.
“Air sealing is the most cost-effective way to improve a home’s energy efficiency. It’s the logical first step in any weatherization project.”
— Joe Nagan, Energy Consultant, Home Building Technology Services
Author’s Pro Tip
Start with the biggest leaks first—attic bypasses and rim joists typically account for more air leakage than all your windows and doors combined. Then work your way to smaller gaps. And always seal before insulating—the correct sequence is what separates a mediocre weatherization job from one that delivers 20%+ savings year after year.
Frequently Analyzed Topics
What is air sealing in weatherization?
Air sealing in weatherization involves closing gaps and leaks in the building envelope—the barrier between your conditioned indoor space and the outdoors—to improve energy efficiency, comfort, and indoor air quality. It targets cracks around windows, doors, attics, basements, plumbing, and electrical penetrations using materials like caulk, spray foam, and weatherstripping.
Can I just add more insulation instead of air sealing?
No. Without sealing air leaks first, insulation cannot perform optimally and energy will still be lost through uncontrolled airflow. Insulation slows heat transfer by conduction, but air movement bypasses it entirely. The DOE recommends always sealing air leaks before adding or upgrading insulation for maximum performance.
How do I know if my home needs air sealing?
Common signs include drafts near windows and doors, rooms that are hard to heat or cool evenly, high energy bills relative to your home’s size, and visible gaps around plumbing or electrical penetrations. A professional blower door test is the most reliable diagnostic method—it measures exactly how much air your home is losing and where.
How long does air sealing last?
Most air sealing materials last 10 to 20 years or more, depending on the product and quality of installation. Spray foam and caulk are particularly durable. Weatherstripping on doors and windows may need replacement every 5 to 10 years as it compresses with regular use.
Is air sealing worth it for newer homes?
Absolutely. Even new construction can have unsealed penetrations due to rushed or incomplete work. An ICF Consulting study found that 89% of U.S. single-family homes are under-insulated, and many newer homes have air leakage issues that weren’t caught during construction. A blower door test will reveal whether your home is meeting its intended performance standards.
Can air sealing make indoor air quality worse?
If a home is sealed too tightly without adding proper ventilation, it’s possible for indoor pollutants and moisture to accumulate. That’s why professional weatherization always pairs air sealing with balanced ventilation solutions—such as Heat Recovery Ventilators (HRVs) or Energy Recovery Ventilators (ERVs)—to maintain healthy air exchange while preserving energy efficiency.
Air Sealing Is the Foundation—Start Here for Maximum Impact
Air sealing is not just another item on the weatherization checklist—it’s the foundation upon which every other upgrade builds. By addressing air leaks first, you lay the groundwork for insulation, HVAC systems, and energy-efficient appliances to perform at their peak potential. The benefits range from tangible energy and cost savings—up to 20% annually on heating and cooling—to improved comfort, better indoor air quality, and enhanced environmental responsibility.
Whether you’re a homeowner looking to reduce drafts in a century-old farmhouse or a commercial property manager seeking to cut operational costs across a multi-unit building, air sealing delivers the highest return on investment of any single weatherization measure. Schedule a professional energy audit, tackle accessible DIY fixes, explore weatherization assistance programs and utility rebates, and combine air sealing with insulation upgrades for maximum impact.
Stop Wasting Energy — Seal Your Home and Start Saving
Air sealing is the most cost-effective upgrade you can make. Find out if you qualify for free or subsidized weatherization services.
✔Reduce heating and cooling costs by up to 20%
✔Free weatherization services for eligible households
✔Improved comfort, air quality, and home value

Lily Strauss is an environmental and energy expert based in Boulder, Colorado, with a background in Environmental Science from Stanford and Energy Policy at a London College. She began her career in environmental consulting before moving into energy policy, contributing to major sustainability initiatives with NGOs and the U.S. Department of Energy. Currently a senior advisor at a global climate think tank, she focuses on energy equity and climate resilience. Outside of work, Lily enjoys rock climbing, photography, and urban farming, and is passionate about climate justice and youth education in sustainability.