How does weather stripping improve home comfort and reduce energy costs?
Weather stripping seals small gaps around doors and windows, preventing air leaks that drive up energy bills. This simple upgrade can cut heating and cooling costs by up to 10%, improve indoor comfort, and block dust, noise, and pests—making it one of the highest ROI DIY home improvements.
What Is Weather Stripping and Why Does It Matter
Weather stripping might sound technical, but it’s one of the simplest ways to improve your home. It’s a peel-and-stick or mechanically installed material used to seal tiny gaps around doors, windows, and attic openings.
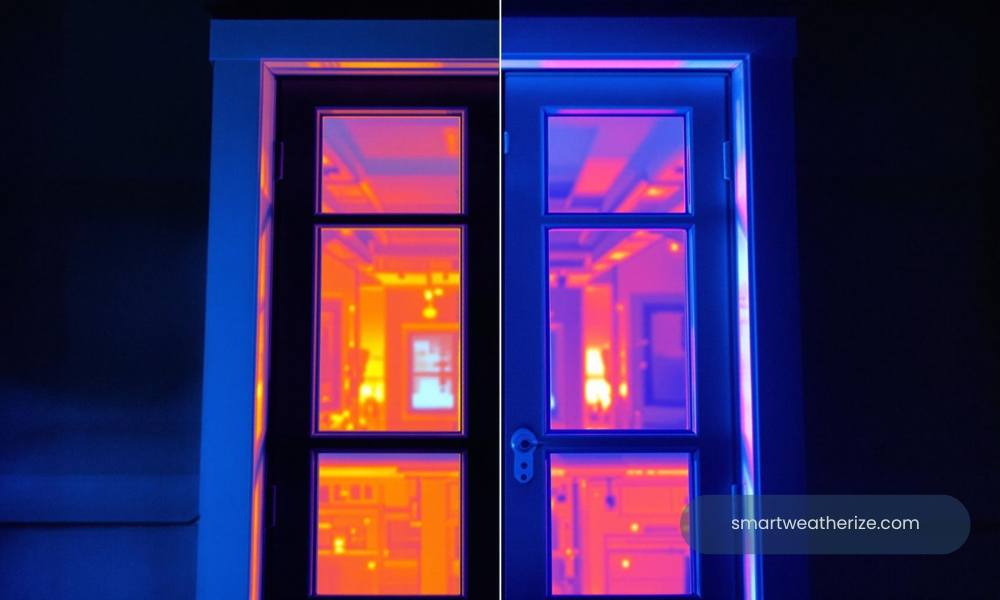
 Weather stripping helps maintain indoor comfort by sealing air leaks.
Those small gaps might seem harmless—but they let conditioned air escape and allow outdoor air, dust, pollen, and even noise to enter. Over time, that translates into higher energy bills and reduced comfort.
Unlike expensive upgrades like new HVAC systems or window replacements, weather stripping is a low-cost, high-impact solution that delivers immediate results.
- Block drafts
- Reduce energy waste
- Keep out dust, pests, and noise
Where It Fits in Weatherization
Weather stripping works best alongside full home weatherization, including:
- Caulking for fixed gaps
- Insulation upgrades for walls and attics
- Energy-saving improvements for long-term efficiency
As a homeowner dealing with uneven temperatures or rising utility bills, this is often the first—and easiest—step to take.
Benefits of Weather Stripping for Homeowners
Energy and Cost Savings
According to the U.S. Department of Energy, sealing leaks can reduce heating and cooling costs by up to 10%.
- Lower monthly utility bills
- Reduced strain on HVAC systems
- Faster heating and cooling cycles
Comfort and Quiet
- Eliminates cold drafts in winter
- Prevents heat intrusion in summer
- Reduces outside noise pollution
Cleaner Indoor Air
- Blocks dust, pollen, and pollutants
- Helps reduce allergy triggers
- Keeps insects and debris outside
📊 Data Highlight
Up to 20% Savings
Combining weather stripping with insulation and sealing can significantly reduce total energy costs.
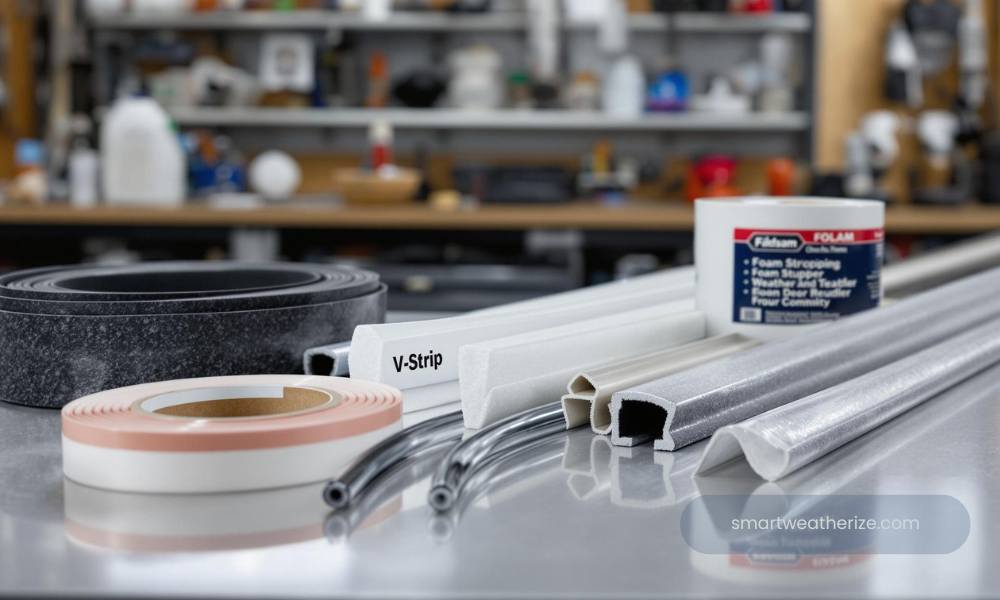
Types of Weather Stripping and Best Uses
Foam Tape
Best for: Windows, attic hatches
Advantage: Easy DIY installation
Limitation: Less durable in high-traffic areas
V-Strip (Tension Seal)
Best for: Sliding or double-hung windows
Advantage: Durable and discreet
Limitation: Requires careful installation
Door Sweeps
Best for: Exterior doors
Advantage: Blocks drafts, rain, and pests
Limitation: Requires tools and a precise fit
Rubber or Vinyl Seals
Best for: Door/window frames
Advantage: Long-lasting and flexible
Limitation: May require fastening
Magnetic Stripping
Best for: Metal doors
Advantage: Airtight seal
Limitation: Higher cost
How to Install Weather Stripping Like a Pro
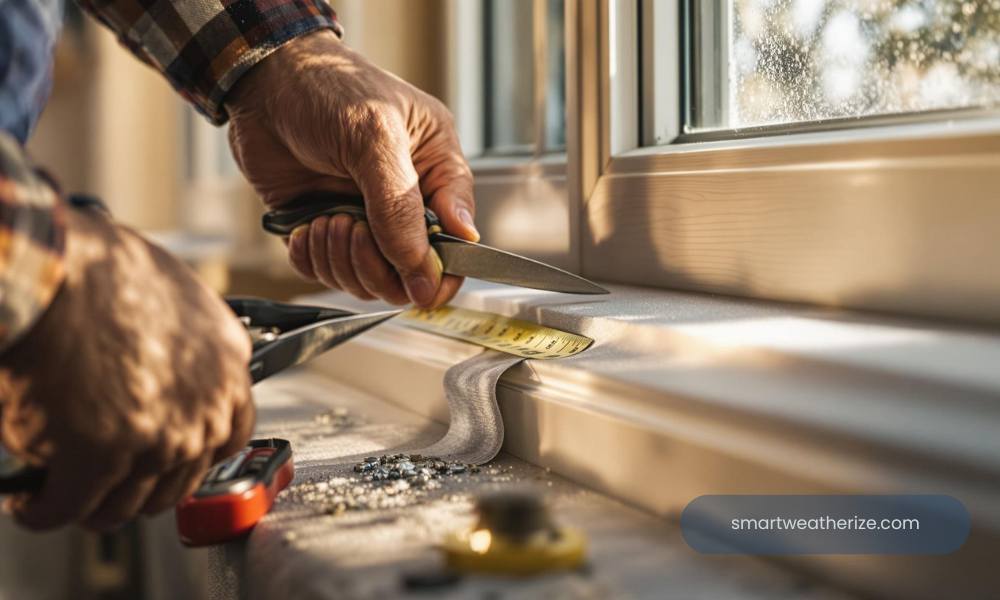 Installing weather stripping is a simple DIY project with big returns.
What You’ll Need
- Tape measure
- Utility knife or scissors
- Adhesive or fasteners
- Cleaning supplies
Installation Steps
- Identify air leaks using touch or light
- Select the right material
- Clean surfaces thoroughly
- Measure and cut precisely
- Apply and secure the material
- Test for remaining drafts
Common Mistakes
- Installing on dirty surfaces
- Using the wrong material type
- Poor alignment is causing gaps
- Applying in cold temperatures
Top Weather Stripping Products in 2026
 Popular weather stripping options for different home applications.
- 3M Indoor Foam Insulation Tape — beginner-friendly
- Frost King V-Seal — durable and low-profile
- M-D Building Products Door Sweep — heavy-duty protection
- Suptikes Draft Stopper — renter-friendly
- Duck Brand Rubber Seal — long-lasting performance
Expert Insights on Weather Stripping ROI
“Weather stripping is the lowest-hanging fruit in residential energy savings. It’s easy, fast, and pays for itself.”
— Linda Wigington, Home Energy Consultant
“You wouldn’t leave a window open all winter. An unsealed door is basically the same.”
— Steve Easley, Building Science Educator
Real-World Results: Small Fix, Big Impact
A homeowner upgraded a drafty older house using basic weather stripping tools and achieved:
- 80% reduction in drafts
- $300 annual heating savings
- Improved comfort and quieter rooms
As a renter or homeowner, this is one of the fastest ways to improve comfort without major renovations.
Ready to Eliminate Drafts and Save Money?
Take control of your home’s comfort today with simple, effective weather stripping solutions.
Frequently Analyzed Topics
How often should weather stripping be replaced?
Most weather stripping lasts 2–5 years, depending on wear, climate, and material quality.
Can I install it myself?
Yes. Most weather stripping products are designed for DIY installation with minimal tools.
Does it work in new homes?
Absolutely. Even new construction can have air leaks that reduce efficiency and comfort.
Final Take: Weather Stripping Is Worth It
- ✔ Lower energy bills instantly
- ✔ Improved comfort year-round
- ✔ Cleaner indoor air
- ✔ Fast, affordable DIY upgrade
Weather stripping proves that small changes can deliver big results. Whether you’re optimizing a rental or upgrading your forever home, this simple fix pays off quickly.

Lily Strauss is an environmental and energy expert based in Boulder, Colorado, with a background in Environmental Science from Stanford and Energy Policy at a London College. She began her career in environmental consulting before moving into energy policy, contributing to major sustainability initiatives with NGOs and the U.S. Department of Energy. Currently a senior advisor at a global climate think tank, she focuses on energy equity and climate resilience. Outside of work, Lily enjoys rock climbing, photography, and urban farming, and is passionate about climate justice and youth education in sustainability.